
My Complete Sim Racing Setup Guide
When I built my first sim racing setup, I thought buying a wheel and pedals would be enough. Very quickly I learned that a good rig is a combination of many parts working together: the cockpit, wheel, pedals, seat, screens, audio, and all the little accessories that make driving feel natural. In this guide I’ll walk you through every major component of a sim racing setup, how I think about choosing each one, and what I consider low, mid, and high-end price ranges.
How I Think About Building a Sim Racing Setup
Before I buy any new part, I ask myself three questions:
- What type of racing do I actually do? (casual, league, drifting, rally, endurance)
- How much space do I have? (desk only, small rig, dedicated room)
- What is my real budget over the next year? (not just today)
Once I answer those, I decide how to spread my money across the main components: cockpit, wheel base, wheel rim, pedals, shifter/handbrake, display or VR, and immersion extras such as audio and tactile feedback. I personally prioritize the wheel base and pedals first, then the cockpit, and only then the cosmetics and extras.
Sim Racing Cockpit and Seat
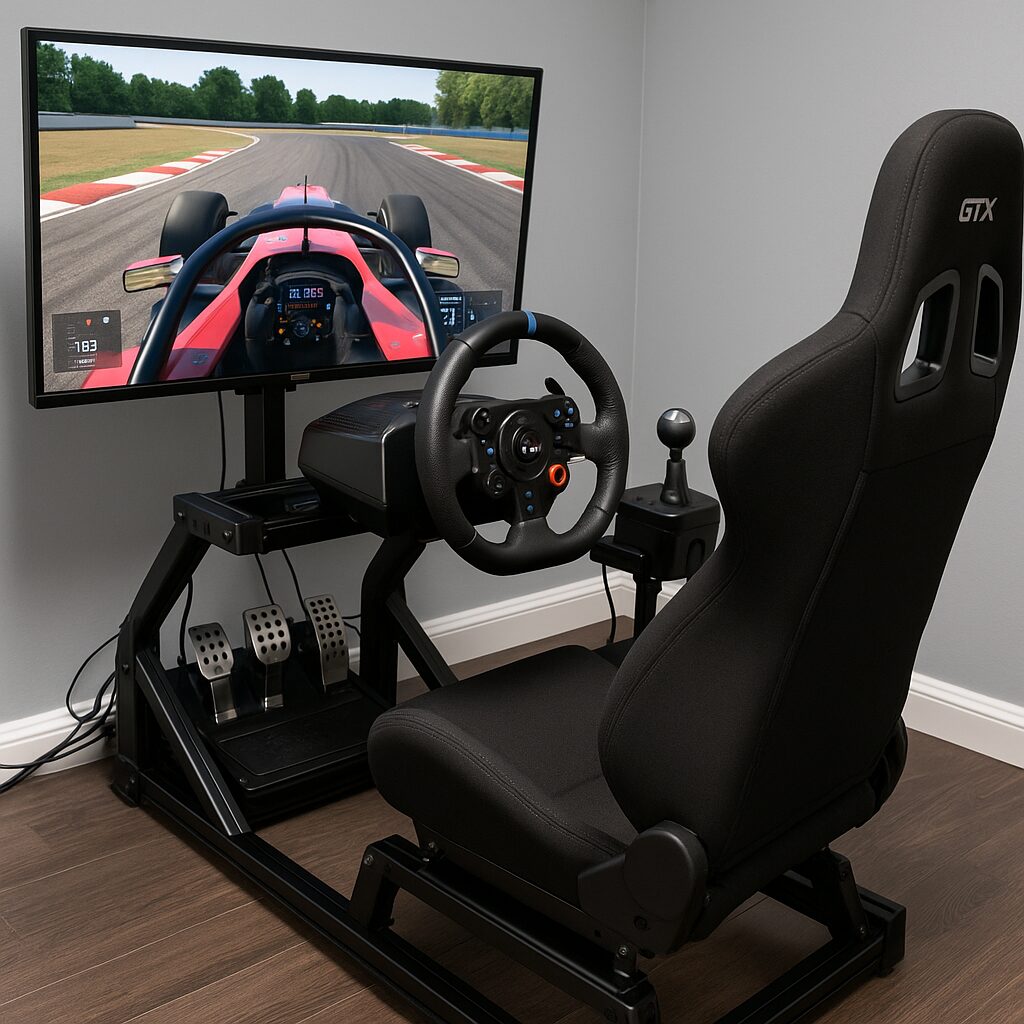
The cockpit is the physical frame that holds the seat, wheel, pedals, and often the screen. Getting this right matters more than I expected because flex and movement can ruin the feel of even the best wheel.
What I Look For in a Cockpit
- Very little flex when I brake hard or turn the wheel
- Adjustable pedal distance and angle
- Adjustable seat position and tilt
- Enough rigidity to support future upgrades (like a stronger direct drive wheel)
Cockpit Price Ranges
Low Budget Cockpit (~$150–$350)
- Typically tubular steel rigs or foldable frames
- Some flex under heavy braking, but perfectly fine for entry-level wheels
- Good if I am just getting started and don’t want a giant frame in my room
Mid Budget Cockpit (~$350–$800)
- Heavier steel or mixed steel/aluminum construction
- Better pedal plates, stronger wheel mounts, often a racing-style seat included
- Stable enough for most belt-drive and many mid-range direct drive wheel bases
High-End Cockpit (~$800+)
- Usually aluminum profile “8020” style rigs or very rigid tubular steel designs
- Minimal flex even with high-torque direct drive wheels and load-cell or hydraulic pedals
- Highly modular: I can mount button boxes, keyboard trays, motion platforms, and triple-monitor stands
Wheel Base and Steering Wheel
The wheel base is the motor that delivers force feedback. The rim is the part I actually hold. For realism and lap time, this is one of the most important investments I can make.
Types of Wheel Bases
- Gear-drive: Uses gears to transmit force. Affordable, but can feel notchy.
- Belt-drive: Uses belts for smoother, quieter force feedback.
- Direct drive: The steering shaft connects directly to the motor. Strongest and most detailed feedback.
Wheel Base Price Ranges
Low Budget (~$200–$400, usually gear or light belt-drive)
- Good starter force feedback, far better than a gamepad
- Ideal if I am not sure how deep I’ll go into sim racing yet
- Torque is limited, so I don’t get the full “ripping the wheel out of my hands” feeling
Mid Budget (~$400–$800, stronger belt or entry direct drive)
- Noticeably better detail and smoothness compared with entry gear-drive wheels
- Enough strength to feel curb strikes, oversteer, and road texture clearly
- This is where I personally feel sim racing starts to become truly immersive
High-End (~$800+ for direct drive)
- Very strong torque with fine detail; I can run lower power but still feel everything
- Best choice if I race competitively or drive a lot of high-downforce cars
- Requires a very solid cockpit and good safety habits (I always reduce torque when I let friends test it)
Steering Wheel Rims
I choose the rim style based on the cars I drive the most:
- Round touring / street wheel: Good all-rounder if I mix road cars, GT, and drifting.
- GT / formula style: Great visibility of screens, lots of thumb-reachable buttons.
- Rally / drift wheel: Often a bit larger diameter with more leverage for counter-steering.
Pedals: Throttle, Brake, and Clutch
Pedals are where I made one of my biggest performance gains. A strong, consistent brake pedal gives me better braking points and more confidence.
Pedal Technologies
- Potentiometer pedals: Measure pedal travel. Common on entry sets, decent but less precise for braking.
- Load-cell brakes: Measure pressure instead of travel. This makes trail braking much more natural.
- Hydraulic pedals: Use fluid and pistons like a real car. Expensive, but incredibly realistic.
Pedal Price Ranges
Low Budget (~$100–$250)
- Plastic or light metal construction, usually potentiometer based
- Good for starting out, especially if my wheel base is also entry-level
- Brake pedal can feel soft or “spongy” compared with real cars
Mid Budget (~$250–$600)
- Often includes a load-cell brake or a strong progressive brake mod
- Much sturdier base and metal pedal arms
- This is where my consistency and confidence on the brakes improved the most
High-End (~$600+)
- High-end load-cell or hydraulic systems with fully adjustable pedal faces, preload, and travel
- Designed to be bolted to a rigid cockpit, not used on the floor
- Best if I’m already deep into league racing or long endurance events
Shifters and Handbrakes
Not every sim racer needs these, but for drifting, rally, and road cars with manual gearboxes, a shifter and handbrake transform the experience.
Types of Shifters
- H-pattern shifters: For classic manuals. I use these for street cars and touring cars.
- Sequential shifters: For rally, touring, and some race cars. Pull or push to shift.
Handbrakes
- On/Off handbrakes: Simple digital signal, good for casual drifting and rally.
- Analog handbrakes: Measure travel or pressure, allowing me to feather the brake mid-slide.
Price Ranges for Shifter and Handbrake
Low Budget (~$60–$150 each)
- Entry-level H-pattern shifters and basic digital handbrakes
- Mostly plastic construction, but still fun and usable
Mid Budget (~$150–$300 each)
- Metal housings, better switches, and smoother feeling gates
- Most popular range for serious hobbyists
High-End (~$300+ each)
- Very robust, often inspired by real motorsport parts
- Highly tunable springs, throw, and feeling
Displays: Monitors and VR
The screen affects my sense of speed, depth, and immersion. I choose between single monitors, triple screens, and VR based on my space and what I value most.
Single Monitor Setup
- At least 27 inches and 1080p or 1440p resolution for clarity
- Higher refresh rate (120 Hz or more) makes motion smoother
- Great if space is limited or I want a simpler, clean setup
Triple Monitor Setup
- Three identical screens, usually 24–32 inches each
- Wraps my field of view and lets me see side windows and mirrors
- Requires more graphics power and a rigid monitor stand
VR Headset
- Incredible sense of depth and presence
- No need for a huge monitor stand
- Can be hot and demanding on the PC, and I need to manage comfort and motion sickness
Price Ranges for Visuals
Low Budget (~$150–$350)
- Single 1080p monitor or a basic entry-level VR headset
- Perfectly usable as long as I sit at the right distance and set my FOV correctly
Mid Budget (~$350–$900)
- Larger 1440p monitors, 144 Hz displays, or more capable VR headsets
- Triple 1080p screens usually fall into this range as well
High-End (~$900+)
- High-resolution triple monitor setups, ultrawide screens, or top-tier VR
- Requires a strong PC but gives me stunning clarity and immersion
Audio: Headphones and Speakers
Sound is often underrated, but when I upgraded my audio, I started reacting to engine pitch, tire scrub, and wind noise much faster.
Audio Options
- Closed-back headphones: Block outside noise and let me focus.
- Open-back headphones: More natural sound but noisier for others.
- Desktop speakers: Great if I want to feel the car in the room, especially combined with a bass shaker.
Audio Price Ranges
Low Budget (~$40–$100)
- Decent gaming headset or small speakers
- Clearly better than using TV speakers
Mid Budget (~$100–$250)
- Higher quality headphones with better imaging and comfort
- 2.1 speaker systems with a subwoofer for punchy engine notes
High-End (~$250+)
- Audiophile-grade headphones and DAC/amps
- Studio monitors or advanced multi-speaker setups
Immersion Extras: Tactile, Motion, and Accessories
Once I’ve locked in the core hardware, I like to add immersion upgrades that make the car feel alive without necessarily making lap times faster.
Tactile Transducers (Bass Shakers)
- Bolted to the seat or pedal deck to simulate engine rumble, curbs, and road texture
- Driven by an amplifier and a dedicated audio channel
Motion Platforms
- Move the seat or whole cockpit to simulate pitch, roll, and heave
- Very immersive but also expensive and space-hungry
Button Boxes, Dash Displays, and Other Accessories
- Button boxes for headlights, wipers, pit requests, and custom functions
- Dash displays showing gear, RPM, and lap times right on the wheel or behind it
- Keyboard trays and mouse mounts so I can actually use the PC comfortably from the rig
Price Ranges for Immersion Extras
Low Budget (~$50–$200)
- Single bass shaker, DIY button box, or simple dash app on a phone or tablet
Mid Budget (~$200–$800)
- Multiple tactile transducers with a proper amp, high-quality button box, or dedicated dash display
High-End (~$800+)
- Full motion platform, integrated tactile system, and a complete dashboard with many programmable controls
How I Would Upgrade Step by Step
If I were starting from zero again, I would build my sim racing setup in stages:
- Start with an entry-level wheel and pedal set mounted to a solid desk or basic stand.
- Add a stronger cockpit once I know I’m serious about the hobby.
- Upgrade pedals to a load-cell set for better braking and consistency.
- Upgrade the wheel base to a mid-range or high-end direct drive unit.
- Improve visuals and audio with better monitors or VR and a good headset.
- Finish with immersion extras like tactile feedback, shifters, and a handbrake.
Final Thoughts
A sim racing setup can be as simple or as extreme as I want it to be. The key for me is balance: there is no point putting a high-end direct drive wheel on a wobbly stand, and there is no reason to buy hydraulic pedals if I am only doing a few casual laps each week. By understanding each component, matching it to my budget, and upgrading in stages, I can build a rig that feels incredible, fits my space, and keeps me excited to drive every time I sit down.

Hi, I’m Peter Edwards, a lifelong sim racing enthusiast, tech tinkerer, and automotive geek with a passion for making virtual racing feel as real as possible. I’ve spent years testing steering wheels, pedals, and full cockpit rigs—from entry-level gear to pro-grade setups—to help others build immersive, affordable racing experiences at home.
When I’m not tightening bolts on my rig or tuning force feedback curves, you’ll find me comparing telemetry data, exploring new racing titles, or helping fellow racers fine-tune their setups. My goal is to share honest, experience-based insights that help every driver—from casual weekend racers to aspiring eSports pros—get faster, smoother, and more connected to the track.
I write for SimRacingEnthusiast.com, where I share deep-dive reviews, setup guides, and honest opinions on the latest in the sim racing world.